*edit: He just posted a video link for how to setup the the awesome spine. Find it here.
I managed to implement the squash and stretch feature to it too...pretty simple overall. I'll try to outline it below. I used translation manipulation to adjust the scale of the joints, and not the actual scale attribute, but the technique should be applicable either way. This just makes for fewer connections to make to see the final result. I'll add some pics in later...
================================================================
Squash and Stretch:
First thing to do, is to select the splineIK curve. In the command line or script editor, type "arclen -ch 1;"
This will create a curveInfo node that will store the length of the curve. With the infoNode still selected go into the hypergraph > input/output connections view.
Create a multiplyDivide node by going under the Rendering Menu > Create Render Node. In this menu, go under the Utilities tab and click on multiplyDivide. If this doesn't show up in the hypergraph window (as it doesn't in mine) Shift-select the curveInfo Node, and go under the Graph menu of the hypergraph, and click Rebuild. This will now display the curveInfo and multiplyDivide node.
Whether in the connection editor or the hypergraph, connect cuveInfo1.arclen to multiplyDivide1.input1X
Open the attribute editor for the multiplyDivide1 node, and type the value from input 1 into input 2. Set the function to divide.
The output will now be normalized. So we can connect this to a multiplyDivide node to control the X translation of the joints (simulating their scale in length).
So, to do this, create another multiplyDivide node, select the first multiplyDivide node, shift-select the second, and open the connection editor. Connect the outputX of multiplyDivide1 to the input1X of the multiplyDivide2 node. If you select the multiplyDivide2 node now, and open the attribute editor, you should see input1 has a value of 1.
Select any of the ik or bind joints, besides the root or first joints, and find their translateX value. Type that value into the multiplyDivide2's input2X window.
Now, just go through and connect the outputX of multiplyDivide2's node to the translateX attribute for the spine_2+_ik joint and the spine_2+_bind joints.
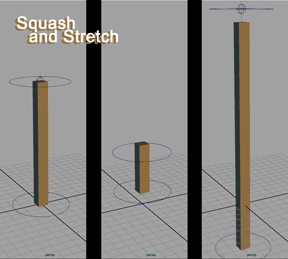

Adding the Mid-Spine Controller:
This next part is fairly simple. First, create a joint and position it halfway up the length of the spine, then group it to itself, by selecting it and hitting Ctrl+G. Then, move the group's pivot point to the same position as the joint, by hitting 'insert' or holding down the D key, and point snapping it to the joint (hold the V key).
Then, create two locators, one named 'mid_hip_point_loc' and the other 'mid_shoulder_point_loc' Snap them to the joint's position as well.
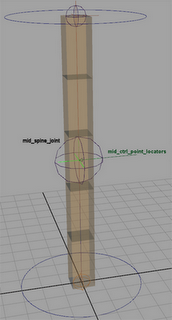
Parent mid_hip_point_loc to the hip control, and mid_shoulder_point_loc to the shoulder control.
Now, you'll see that as you rotate the two controls, the locators move with the rotations in nice pretty arcs.
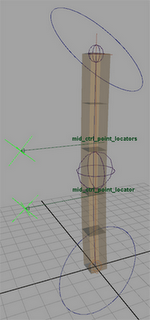
Now, we need to have those control the position of the mid-joint's group. So, select the two mid_point_locators, then the mid joint's group, and go to Constrain > Point Constrain on the marking menu. The Joint should now move and maintain a middle position in relation to the two mid_point_locators.
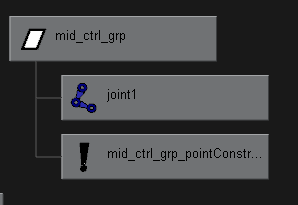
Now, we just need the joint to affect the curve. So, grab the mid-spine joint, shift-select the spine's curve, then on the marking menu (hold the Space Bar to bring it up), go to Skin > Edit Smooth Skin > Add Influence. This will add the joint as an influence to the curve.
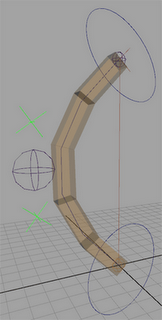
And there you have it. More control over the curve of the spine, while still allowing for the twisting ability. Enjoy!
No comments:
Post a Comment